Chocolate Heaven No-Bake Granola Bars: A Delightful Treat for Everyone
No-bake granola bars have become a staple in many households, prized for their convenience and versatility. They offer an effortless way to enjoy a wholesome snack without the need for an oven, making them perfect for busy lifestyles. For those seeking a delicious yet healthy treat, the “Chocolate Heaven No-Bake Granola Bars” recipe stands out. This indulgent snack not only satisfies your sweet tooth but also packs a nutritional punch, making it an ideal choice for families, athletes, or anyone looking to fuel their day with wholesome ingredients.
A Deliciously Healthy Snack
The appeal of no-bake granola bars lies in their simplicity. With just a handful of ingredients, you can whip up a batch in no time, eliminating the need for elaborate cooking techniques or lengthy preparation times. The “Chocolate Heaven No-Bake Granola Bars” are designed to be both nutritious and enjoyable, providing a balance of flavors and textures that everyone can appreciate. With the inclusion of rolled oats, nut butter, and natural sweeteners, these bars cater to various dietary preferences, including vegetarian and gluten-free diets, by allowing for ingredient substitutions where necessary.
Understanding the Ingredients
Before diving into the preparation steps, it’s essential to understand the core ingredients that make up these delectable bars. Each component not only contributes to the flavor but also enhances the overall nutritional profile, making these treats a guilt-free indulgence.
– Rolled Oats: The foundation of any granola bar, rolled oats are a fantastic source of dietary fiber, which aids digestion and keeps you feeling full longer. They provide sustained energy, making them an excellent choice for pre- or post-workout snacks.
– Almond Butter: This creamy nut butter adds healthy fats and protein, promoting a sense of satiety and providing essential nutrients. Almond butter is also rich in vitamins and minerals, such as vitamin E, magnesium, and potassium, which contribute to overall health.
– Honey or Maple Syrup: As natural sweeteners, honey and maple syrup not only enhance the flavor of the bars but also bring additional health benefits. Honey has antimicrobial properties and can soothe sore throats, while maple syrup contains antioxidants and minerals like zinc and manganese.
– Mini Chocolate Chips: These tiny morsels add a touch of indulgence to the bars. While they provide sweetness, they can also be a source of antioxidants, especially if you opt for dark chocolate varieties.
– Chia Seeds: Though optional, chia seeds are a powerhouse of nutrition. They are high in omega-3 fatty acids, fiber, and protein, which can support heart health and improve digestion.
– Chopped Nuts: Adding chopped nuts not only enhances the texture of the granola bars but also provides heart-healthy fats, protein, and a variety of vitamins and minerals. Nuts like almonds, walnuts, or pecans can be used according to personal preference.
– Vanilla Extract and Sea Salt: These ingredients are key to elevating the flavor profile of the bars. A splash of vanilla extract adds warmth and depth, while a pinch of sea salt balances the sweetness, making every bite a delightful experience.
Preparation Steps for Perfect No-Bake Bars
Now that we’ve explored the ingredients, let’s move on to the preparation process. Making “Chocolate Heaven No-Bake Granola Bars” is straightforward and requires minimal effort, making it accessible for both novice cooks and experienced bakers alike. Follow these steps to create your delicious granola bars:
1. Prepare the Pan: Start by preparing your baking pan. Line an 8×8-inch square pan with parchment paper, allowing some overhang on the sides. This will make it easier to lift the bars out once they are set. Be sure to press the parchment paper into the corners and sides of the pan to avoid any gaps.
2. Combine Dry Ingredients: In a large mixing bowl, combine the rolled oats, chopped nuts, and optional chia seeds. Mix these dry ingredients thoroughly to ensure even distribution. This initial step is crucial for achieving a consistent texture throughout the bars.
3. Mix Wet Ingredients: In a separate bowl, combine the almond butter, honey or maple syrup, and vanilla extract. To achieve a creamy consistency, you might want to warm the almond butter slightly in the microwave for about 10-15 seconds. This will make it easier to mix with the other wet ingredients. Stir the mixture until it is smooth and well combined, ensuring that the almond butter is fully incorporated with the sweetener and vanilla.
4. Combine Wet and Dry Mixtures: Pour the wet mixture over the dry ingredients. Using a spatula or wooden spoon, mix everything together until all the dry ingredients are coated. The mixture should be sticky and hold together when pressed. If it appears too dry, you can add a little more almond butter or sweetener to achieve the right consistency.
5. Fold in Chocolate Chips: Once the mixture is well combined, gently fold in the mini chocolate chips. Be careful not to overmix, as you want the chocolate to maintain its shape and not melt completely into the mixture.
6. Press into the Pan: Transfer the granola mixture into the prepared pan. Using a spatula or your hands, firmly press the mixture down into an even layer. This step is vital, as it helps the bars hold their shape once set. Make sure to pack it tightly, as loose bars may crumble when cut.
By following these steps, you’re well on your way to creating your own batch of “Chocolate Heaven No-Bake Granola Bars.” With their delightful combination of flavors and textures, these bars promise to be a satisfying snack for anyone, any time of the day. Stay tuned for the next part, where we will cover the final steps, including how to set the bars and tips for storage and customization.
{{image_2}}
Combining Mixtures: Tips for Effective Mixing
Once you have your dry ingredients and wet ingredients prepared, the next step is to combine them effectively. It’s crucial to ensure that every component of your Chocolate Heaven No-Bake Granola Bars is well-coated, which enhances both flavor and texture. Here are some tips to achieve this:
– Use a Large Bowl: Selecting a bowl that’s large enough will give you the space needed to mix without spilling ingredients. This prevents mess and allows for easier stirring.
– Mixing Technique: Start by pouring the wet mixture over the dry ingredients. Use a spatula or wooden spoon to fold the ingredients together rather than stirring vigorously. This gentle folding motion helps to evenly distribute the wet ingredients without breaking down the granola too much.
– Ensure Even Coating: Scrape the sides and bottom of the bowl as you mix to ensure all ingredients are thoroughly combined. You want to see a uniform mixture where no dry oats remain visible. If you find that the mixture is a bit too dry, add a tablespoon of nut butter or a splash of water to help things come together.
Folding in Chocolate Chips: Best Practices for Maintaining the Integrity of the Chips
Once your mixture is well-combined, it’s time to fold in the chocolate chips. This step is essential for adding that heavenly chocolate flavor without compromising the texture of the bars. Here’s how to do it effectively:
– Wait Until the Mixture Is Cool: If your wet ingredients were heated, allow the mixture to cool slightly before adding the chocolate chips. This prevents the chips from melting and losing their shape.
– Gently Fold: Using a spatula, gently fold the chocolate chips into the mixture. Be careful not to over-mix, as this can break the chips apart. The goal is to have whole, intact chocolate chips evenly distributed throughout the mixture.
Transferring to the Pan: Importance of Compression for Bar Stability
Transferring your mixture to the pan correctly is vital for achieving stability in your granola bars. Here’s how to do it:
– Prepare the Pan: Line an 8×8 inch or 9×9 inch baking dish with parchment paper, leaving some overhang on the sides for easy removal later. This also helps prevent sticking.
– Pressing the Mixture: Pour the mixture into the prepared pan and use a spatula or your hands to press it down firmly. Compression is key; the more you pack the mixture, the more cohesive your bars will be after chilling. Ensure the mixture is spread evenly across the pan.
– Smooth the Top: Use the back of the spatula to smooth the top of the mixture to ensure an even surface for slicing later.
Chilling Process: Explanation of Chilling Methods
After transferring the mixture to the pan, the next step is chilling, which allows the bars to set properly. There are two primary methods to chill your granola bars:
– Refrigerator: If you choose to chill your bars in the refrigerator, allow them to set for at least two hours. This method is straightforward and allows the bars to become firm enough to slice.
– Freezer: For quicker results, you can place the pan in the freezer for about 30-45 minutes. This method speeds up the setting process, making it easier to slice your bars sooner. Just be cautious not to leave them in the freezer too long, as they can become too hard.
Slicing and Serving: Techniques for Achieving Neat, Uniform Bars
Slicing your granola bars can be an art in itself. Here are some techniques to ensure you achieve neat, uniform bars:
– Use a Sharp Knife: A sharp chef’s knife is essential for clean cuts. Dull knives tend to crush the bars rather than slice them cleanly.
– Warm the Knife: For an even smoother cut, run the knife under hot water and wipe it dry before slicing. This will help the knife glide through the bars.
– Cut While Cold: It’s easier to slice the bars when they are cold, so if you’ve used the freezer method, take them out just before slicing.
– Uniform Sizes: To keep your granola bars consistent, consider using a ruler to measure and mark where you’ll cut. This will help ensure that all bars are the same size, making for a more professional presentation.
Nutritional Benefits of Chocolate Heaven Granola Bars
These Chocolate Heaven No-Bake Granola Bars are not just a delicious snack; they also pack a nutritional punch. Here’s a detailed breakdown of their nutritional profile:
– Caloric Content: Each bar contains approximately 150-200 calories, depending on the specific ingredients used. This makes them a great option for a mid-afternoon snack or a post-workout treat, especially when compared to store-bought alternatives that can pack in excess calories and unhealthy additives.
– Fiber: With oats and nuts as key ingredients, these bars are a good source of dietary fiber, promoting digestive health and helping to keep you feeling full longer.
– Protein: The nuts and seeds contribute a healthy dose of protein, which is essential for muscle repair and overall body function.
– Healthy Fats: The inclusion of nut butters provides healthy fats that are beneficial for heart health and can help to lower bad cholesterol levels.
– Antioxidants: Dark chocolate and nuts are rich in antioxidants, which help combat oxidative stress and inflammation in the body.
These granola bars can fit seamlessly into a balanced diet, providing essential nutrients without compromising on flavor.
Creative Variations and Additions
One of the best aspects of making your own granola bars is the ability to customize them to fit your dietary needs and flavor preferences. Here are some suggestions for variations and additions:
– Ingredient Substitutions: If you’re looking to cater to specific dietary requirements, consider substituting ingredients. For example, swap out peanut butter for almond or sunflower seed butter for nut-free options.
– Gluten-Free Options: Use certified gluten-free oats to make these bars suitable for those with gluten sensitivities. This ensures everyone can enjoy the delicious taste without worry.
– Vegan Modifications: For a vegan-friendly version, simply substitute honey with maple syrup or agave nectar. This keeps the bars sweet while adhering to vegan dietary restrictions.
– Flavor Variations: Introduce spices like cinnamon or nutmeg into the mixture for added flavor depth. You might also consider incorporating dried fruits like cranberries or apricots for a chewy texture and burst of sweetness.
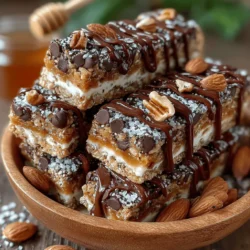
– Presentation Ideas: Enhance the visual appeal of your bars by drizzling melted chocolate over the top or sprinkling with sea salt before chilling. You can also cut them into fun shapes using cookie cutters for a unique presentation.
Conclusion
The Chocolate Heaven No-Bake Granola Bars are not just simple to make; they are incredibly versatile and can be tailored to suit a variety of tastes and dietary needs. With just a few steps, you can create a delicious snack that rivals store-bought options in both flavor and nutrition.
We encourage you to try making these bars for yourself and experiment with your own variations to find the perfect combination that suits your palate. Remember, homemade snacks are often healthier alternatives to packaged options and allow you to control the ingredients and flavors. Enjoy the satisfaction of creating something delicious and nourishing that you can share with family and friends!