Mini Pumpkin Pie Crescent Cups: A Delightful Fall Treat
As the leaves begin to turn and the air grows crisp, the aroma of pumpkin spice wafts through kitchens everywhere, signaling the arrival of fall. Amidst the season’s rich tapestry of flavors, mini pumpkin pie crescent cups stand out as an irresistible dessert that perfectly encapsulates the essence of autumn. These delightful treats combine the beloved flavors of traditional pumpkin pie with the flaky, buttery texture of crescent rolls, making them a convenient option for gatherings, holidays, or simply indulging at home.
Imagine serving these bite-sized wonders at your next potluck or holiday feast; they are sure to be a crowd-pleaser, delighting both young and old alike. Not only are they visually appealing, but they also offer a unique twist on a classic dessert that can be enjoyed in a fun, handheld format. Whether you’re hosting a Thanksgiving dinner or simply craving a sweet treat to brighten your day, mini pumpkin pie crescent cups are the perfect solution.
Understanding the Ingredients
To create these delicious mini pumpkin pie crescent cups, it’s essential to understand the key ingredients that contribute to their success. At the heart of this recipe is canned pumpkin puree, which provides the rich, earthy flavor associated with pumpkin pie. It’s important to note that you should use pumpkin puree rather than pumpkin pie filling. The latter often contains additional spices and sweeteners that can alter the final taste and texture of your dessert. Pure pumpkin puree allows you to control the flavor profile, ensuring that your crescent cups taste authentically homemade.
Another critical ingredient is sweetened condensed milk. This creamy component adds the necessary richness and sweetness to the pumpkin filling. Its thick consistency helps create a smooth, velvety texture that pairs wonderfully with the flaky crust of the crescent rolls. The sweetened condensed milk acts as a binder, melding the flavors together and providing the perfect level of sweetness without overpowering the natural taste of pumpkin.
Spices play a pivotal role in achieving the characteristic flavor of pumpkin pie. A blend of cinnamon, nutmeg, and ginger will elevate your mini pumpkin pie crescent cups, infusing them with warmth and depth. These spices not only enhance the overall taste but also evoke the comforting essence of fall, making each bite a nostalgic experience.
Preparation Steps
Preparing mini pumpkin pie crescent cups is a straightforward process that even novice bakers can master. To begin, it’s crucial to preheat your oven to 375°F (190°C). Preheating ensures that your crescent cups bake evenly and develop that perfect golden-brown crust. While your oven is heating, you can focus on preparing the crescent dough.
Start by unrolling the crescent roll dough. Take care to separate the dough into individual triangles along the perforated lines. For a more uniform cup shape, you can gently stretch each triangle to create a slightly larger base. This will help ensure that the dough adequately forms a cup that can hold the delicious pumpkin filling.
Next, you will need to prepare a muffin tin. Lightly grease each muffin cup with non-stick cooking spray or butter to prevent sticking. Carefully place each triangle of crescent dough into a muffin cup, pressing down gently to mold it into a cup shape. Ensure that the dough covers the bottom and sides of the muffin tin evenly. This step is crucial for achieving the desired texture in each cup, as an even distribution of dough will help them bake uniformly.
Creating the Pumpkin Filling
Now that your dough is ready, it’s time to whip up the pumpkin filling. In a mixing bowl, combine the canned pumpkin puree with sweetened condensed milk, eggs, and your chosen spices. Using a whisk or electric mixer, blend the ingredients thoroughly until you achieve a smooth and creamy consistency. This step is vital, as a well-mixed filling ensures that every mini cup is packed with flavor.
As you mix in the spices, take a moment to appreciate how each one contributes to the classic pumpkin pie taste. The warmth of cinnamon complements the earthiness of the pumpkin, while nutmeg adds a hint of nutty complexity. Ginger introduces a subtle spiciness that balances the sweetness of the filling. The thoughtful combination of these spices is what sets your mini pumpkin pie crescent cups apart from ordinary desserts.
Once the filling is ready, carefully pour it into each crescent dough cup, filling them about three-quarters full. This will allow room for the filling to expand during baking without overflowing. The combination of the flaky crust and creamy pumpkin filling will create a delightful texture that is both satisfying and indulgent.
With the oven preheated and your mini pumpkin pie crescent cups assembled, you’ll be just moments away from enjoying a warm, comforting dessert that encapsulates the flavors of fall. Stay tuned for the next part of this article, where we will explore the baking process and tips for serving these delightful treats.
{{image_2}}
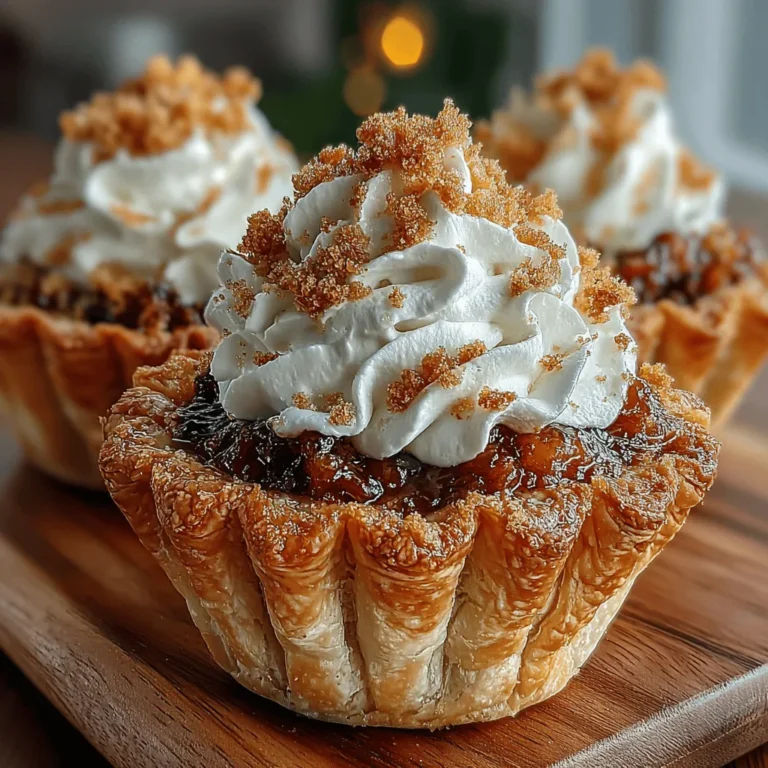
The Mini Pumpkin Pie Crescent Cups are not only a feast for the eyes but also a delightful combination of flavors that capture the essence of fall. Balancing the sweetness of the pumpkin with the warm spices—cinnamon, nutmeg, and ginger—is key to creating a treat that appeals to all palates. As we delve into the baking process, serving suggestions, and storage tips, you’ll discover how to elevate these mini desserts, making them the star of any gathering.
Baking the Mini Cups
The baking process is where the magic truly happens. Preheat your oven to 375°F (190°C) and prepare your baking tray by greasing it lightly to prevent any sticking. As you work through the steps, remember that baking is as much an art as it is a science, particularly when it comes to timing and temperature.
Optimal Baking Time
Once your crescent cups are filled with the pumpkin mixture, it’s time to place them in the oven. Bake the mini cups for about 15 to 20 minutes. However, the optimal baking time can vary slightly based on your oven, so it’s crucial to keep an eye on them as they bake.
Checking for Doneness
To check for doneness, look for a few visual cues. The crescent cups should be golden brown on the edges, while the filling will have a slight jiggle in the center but should not appear overly liquid. A toothpick inserted into the filling should come out clean or with just a few moist crumbs attached. This indicates that the filling has set properly and is ready for removal from the oven.
Cooling and Transferring
Once baked, allow the mini cups to cool in the tray for about 5 to 10 minutes. This resting period is essential as it helps the filling firm up and makes transferring easier. After cooling slightly, use a small spatula or knife to gently pry the cups from the tray. Be careful during this step to maintain their shape. Transfer them to a wire rack to cool completely, ensuring they maintain their delightful presentation.
Serving Suggestions
As the mini pumpkin pie crescent cups cool, think about how you want to present them. Their adorable shape and warm spices make them perfect for any fall gathering, from Thanksgiving dinners to cozy get-togethers with friends.
Creative Enhancements
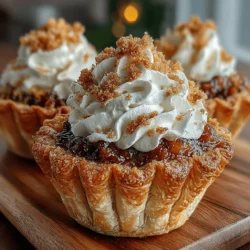
Enhance the flavor and visual appeal of your mini cups with a dollop of freshly whipped cream on top. The cream adds a luxurious creaminess that beautifully complements the spiced filling. For added texture and crunch, consider sprinkling a layer of crushed graham crackers over the whipped cream. This not only adds a delightful crunch but also evokes the classic crust of a traditional pumpkin pie.
Chopped pecans or walnuts can also bring an earthy flavor and a bit of crunch to each bite. Simply sprinkle them on top before serving or mix them into the filling for added richness.
Presentation Ideas
For gatherings, consider arranging the mini pumpkin pie cups on a festive platter. You can place them in muffin liners for a more polished look or leave them plain for that rustic charm. Garnish the platter with seasonal decorations like small pumpkins, cinnamon sticks, or fall leaves to create a warm and inviting atmosphere.
Another creative idea is to serve them as part of a dessert bar, allowing guests to choose their toppings and personalize their treats. This interactive element can be a fun way to engage your friends and family.
Storage and Shelf Life
If you have leftovers (though they might not last long!), proper storage is key to maintaining the deliciousness of your mini pumpkin pie cups. Allow them to cool completely before storing them in an airtight container. This will help prevent moisture from making the crust soggy.
Duration for Consumption
When stored correctly, these mini cups can last up to three days in the refrigerator. However, for the best taste and texture, it’s recommended to enjoy them within the first two days. The longer they sit, the more the crust can absorb moisture, which might affect the delightful crunch.
Reheating Tips
If you want to enjoy these treats even after a day or two, reheating them is a great option. Preheat your oven to 350°F (175°C) and place the cups on a baking sheet. Heat for about 5 to 10 minutes or until warmed through. This method will help revitalize the flaky texture of the crescent cups, making them taste freshly baked.
Conclusion
Making Mini Pumpkin Pie Crescent Cups is a delightful experience that brings the flavors of fall right into your kitchen. Their simple preparation and impressive presentation make them an ideal dessert for any occasion. Whether enjoyed at a family gathering or shared with friends, these mini treats encapsulate the joy of baking and sharing delicious food.
Invite your loved ones to partake in this lovely culinary experience. As you savor each bite, celebrate the warmth of the season and the joy of creating something special together. So roll out that crescent dough, mix up the pumpkin filling, and treat yourself and your loved ones to these charming mini desserts that are sure to become a favorite tradition for years to come.