
Introduction
Mini Grilled Cheese Pizza Melts are a delightful fusion of two beloved comfort foods: the classic grilled cheese sandwich and the ever-popular pizza. Imagine the gooey goodness of melted cheese, the savory aroma of fresh toppings, and the satisfying crunch of perfectly toasted bread—all in a bite-sized format that’s perfect for any occasion. Whether you’re hosting a casual family dinner or planning snacks for a party, these mini melts deliver both flavor and fun, making them a hit among kids and adults alike.
The beauty of Mini Grilled Cheese Pizza Melts lies in their versatility. With a few simple ingredients and a short preparation time, you can whip up these delightful morsels that cater to diverse tastes. The ease of preparation means you can involve the whole family in the cooking process, creating a shared experience that enhances the joy of enjoying good food together. Imagine gathering around the kitchen, assembling your melts with various toppings, and then savoring the delicious results—there’s something special about homemade treats that store-bought snacks simply can’t replicate.
The Allure of Mini Grilled Cheese Pizza Melts
What makes Mini Grilled Cheese Pizza Melts such a popular choice? For many, the nostalgic comfort of a grilled cheese sandwich evokes fond childhood memories. The crunchy exterior and warm, gooey interior of a perfectly toasted grilled cheese bring a sense of warmth and satisfaction. When you combine that with the vibrant flavors of pizza—think rich tomato sauce, melty cheese, and your favorite toppings—the result is a dish that is both comforting and exciting.
These melts are not just for kids; adults will also find themselves coming back for seconds. The playful nature of bite-sized snacks makes them perfect for gatherings, and their customizable nature means everyone can tailor them to their liking. Want extra pepperoni? Go for it! Prefer a vegetarian option with mushrooms and bell peppers? You’ve got it! This adaptability makes Mini Grilled Cheese Pizza Melts an excellent choice for parties, game nights, or simply a cozy family movie night.
Ingredients Breakdown
To create the perfect Mini Grilled Cheese Pizza Melts, it’s essential to understand the role of each ingredient. Here’s a closer look at what you’ll need:
– Pizza Sauce: This ingredient serves as the flavorful foundation for the melts. Not only does it provide moisture, preventing the bread from becoming too dry, but it also infuses every bite with that quintessential pizza flavor. Look for a quality pizza sauce that balances sweetness and acidity for the best results.
– Bread: The choice of bread is crucial for texture and flavor. White bread is a popular option due to its soft, pillowy structure that crisps up beautifully when grilled. Its neutral taste allows the flavors of the cheese and toppings to shine while providing a satisfying crunch. For those seeking a more artisanal touch, whole wheat or sourdough bread can also work wonderfully.
– Cheeses: The cheese is the star of the show, and a combination of mozzarella and cheddar is a winning choice. Mozzarella is known for its excellent melting properties, creating that gooey, stretchy texture everyone loves. Cheddar, on the other hand, adds sharpness and depth of flavor, making each bite more indulgent. This duo not only melts beautifully but also offers a delightful balance of creaminess and tanginess.
– Toppings: The possibilities are endless when it comes to toppings, allowing you to personalize each melt according to your preferences. Classic options like pepperoni are always a hit, but you can also get creative with sautéed mushrooms, colorful bell peppers, olives, or even fresh basil. These toppings enhance the flavor profile and add visual appeal, making your Mini Grilled Cheese Pizza Melts as pleasing to the eyes as they are to the palate.
– Butter and Seasonings: For that golden-brown, crispy exterior, butter is essential. It not only adds richness but also promotes even browning when grilling the melts. Additionally, incorporating Italian seasoning and garlic powder elevates the flavor, infusing each bite with aromatic herbs and spices that complement the pizza theme perfectly.
Step-by-Step Instructions
Now that we’ve covered the inspiration and ingredients for Mini Grilled Cheese Pizza Melts, it’s time to dive into the preparation process. Here’s a comprehensive guide to making these delightful snacks, starting with the preparation of the bread.
Preparation of Bread
1. Gather Your Ingredients: Before you start, ensure you have all your ingredients laid out. This includes your chosen bread, pizza sauce, cheeses, toppings, butter, and seasonings. Having everything within reach makes the cooking process smoother and more enjoyable.
2. Slice the Bread: Begin by slicing your bread into manageable pieces. If you’re using a standard loaf of white bread, cutting each slice into quarters will yield the mini size perfect for melts. You should aim for uniform thickness to ensure even grilling.
3. Butter the Bread: Take softened butter and spread an even layer on one side of each piece of bread. This is essential for achieving that crispy, golden-brown crust that makes grilled cheese so irresistible. If you want an extra flavor boost, consider mixing in a pinch of garlic powder or Italian seasoning into the butter before spreading.
4. Assemble the Melts: On the unbuttered side of half the bread slices, spread a thin layer of pizza sauce. Be careful not to overdo it; too much sauce can make the melts soggy. Next, sprinkle the shredded mozzarella and cheddar cheese over the sauce. Add your desired toppings, ensuring they are evenly distributed but not piled too high.
5. Create the Sandwiches: Top the assembled slices with the remaining pieces of bread, buttered side facing out. This creates a sandwich structure that will hold together during grilling while allowing the cheese to melt beautifully.
This preparation sets the stage for cooking your Mini Grilled Cheese Pizza Melts, where the magic truly happens. Stay tuned for the next part, where we’ll guide you through the grilling process and share tips on achieving the perfect melt!
{{image_2}}
Preparing the Bread
To start making your Mini Grilled Cheese Pizza Melts, the first step is preparing the bread. The choice of bread can significantly influence the overall flavor and texture of your melts. For this recipe, a thick-sliced bread, such as sourdough or whole grain, works wonderfully due to its sturdy structure, which holds up well against the gooey cheese and rich toppings.
Once you’ve selected your bread, it’s crucial to apply the pizza sauce evenly. Using a generous layer of sauce not only enhances the flavor but also keeps the bread from drying out during grilling. Spread about a tablespoon of pizza sauce on one side of each slice of bread. Be sure to reach the edges to ensure every bite is packed with flavor. An even distribution of sauce is key; it prevents sogginess and helps maintain the desired texture of crispy, cheesy goodness.
Layering the Cheese and Toppings
Next comes the exciting part: layering the cheese and toppings. The balance of ingredients will elevate your Mini Grilled Cheese Pizza Melts to a new level. Start with a layer of cheese, such as mozzarella, which melts beautifully and provides that classic pizza flavor. Use about one ounce per sandwich, finely shredded, to ensure a good melt and even distribution.
After the mozzarella, consider adding a sprinkle of grated Parmesan for an extra depth of flavor. Parmesan not only enhances the taste but also adds a slight crunch when grilled.
Now, it’s time to add your favorite toppings. This is where you can customize your Mini Melts. Diced bell peppers, thinly sliced pepperoni, or olives work well, but feel free to experiment with whatever you love. Spread toppings evenly over the cheese, ensuring they don’t overpower the sandwich. A good rule of thumb is to keep toppings to about a quarter of the amount of cheese used, allowing the cheese to shine through while still providing that satisfying pizza experience.
Finish with another layer of cheese before topping with the second slice of bread. This creates a delicious cheese barrier that locks in all the flavors.
Completing the Sandwiches
Once your sandwiches are layered, it’s important to seal them effectively to prevent any cheesy spillage during grilling. Press down gently on the top slice of bread to ensure a good bond with the cheese and toppings. You can also lightly brush the edges with a bit of pizza sauce to help the bread adhere to itself.
For extra security, you might consider using toothpicks to hold the sandwiches together during grilling. Just remember to remove them before serving! This small step can help maintain the integrity of your melts, especially if you’re making several at once.
Creating the Flavorful Butter Mixture
To achieve that golden, crispy crust that every great grilled cheese should have, you need a flavorful butter mixture. In a small bowl, combine softened butter with a teaspoon of garlic powder and a pinch of Italian seasoning. The garlic powder adds a punch of flavor, while the Italian seasoning ties in the classic pizza herbs like oregano and basil.
Spread this mixture generously on the outer side of each slice of bread. This not only contributes to a beautiful golden color when grilled but also infuses the bread with additional flavor, complementing the cheesy, saucy filling inside.
Grilling to Perfection
Grilling your Mini Grilled Cheese Pizza Melts is the final step, and temperature control is crucial for achieving that perfect melt. Preheat your skillet or griddle over medium heat; too high a temperature will burn the bread before the cheese has a chance to melt.
Place the sandwiches in the skillet, cooking for about 3-4 minutes on one side. Use a spatula to gently press down on the sandwich, encouraging even browning and melting. Once you see that golden-brown crust forming, it’s time to flip the sandwiches. To ensure even cooking, slide the spatula completely underneath the sandwich and flip with a flick of the wrist, or you can use two spatulas for more control.
Cook for an additional 3-4 minutes on the other side. If you notice the bread browning too quickly but the cheese isn’t melting, reduce the heat slightly.
Serving Suggestions
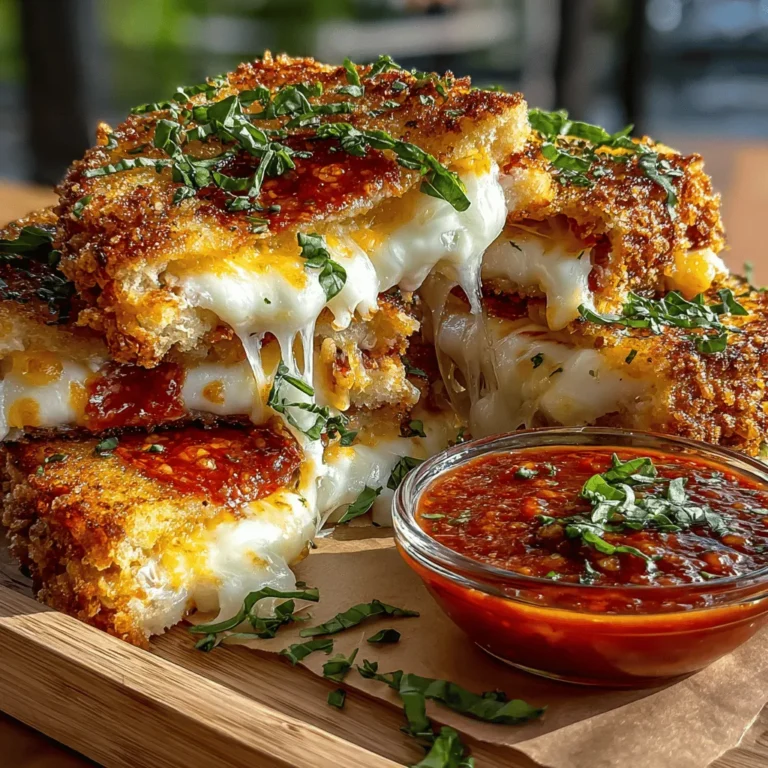
When your Mini Grilled Cheese Pizza Melts are perfectly golden and the cheese is gooey, it’s time to serve! These delightful melts can be enjoyed as is, or you can elevate the experience by offering extra pizza sauce for dipping. This adds an interactive element to your meal and allows everyone to customize their bites.
For a touch of freshness and presentation, consider garnishing with fresh basil or oregano leaves. Not only do they add a pop of color, but they also enhance the pizza flavor profile. You could also serve alongside a simple salad or some vegetable sticks to balance out the richness of the cheese.
Nutritional Information
These Mini Grilled Cheese Pizza Melts are more than just a delicious indulgence; they can also provide some nutritional benefits. The cheese offers a good source of protein and calcium, essential for maintaining strong bones and muscle health. If you choose to add vegetables like bell peppers or spinach, you’ll boost the fiber and vitamin content of your meal, making it a more balanced option.
While they are certainly a comfort food, moderation is key. Being mindful of portion sizes will help you enjoy these treats without overindulging.
Conclusion
Mini Grilled Cheese Pizza Melts are a fantastic fusion of two beloved comfort foods that not only delight the taste buds but also bring people together. This easy-to-prepare recipe is perfect for gatherings, game days, or a cozy night in with family and friends.
Encouraging creativity with toppings allows each person to customize their melts, adding personal flair. Whether you stick to the classic cheese and sauce or venture into more adventurous toppings, the joy of making and sharing these melts is sure to create lasting memories. So gather your ingredients, fire up that skillet, and enjoy the deliciousness of Mini Grilled Cheese Pizza Melts!
