Strawberry Bliss Bars: A Delightful Summer Treat
As the sun shines brightly and the days grow longer, there’s nothing quite like a refreshing dessert to cool off and indulge in the flavors of summer. Enter Strawberry Bliss Bars—a delightful blend of fresh strawberries, creamy Greek yogurt, and rich coconut cream that will tantalize your taste buds and leave you craving more. These bars are not only a treat for your palate but also a healthier dessert option that can easily be enjoyed on warm afternoons, picnics in the park, or even as a nutritious snack for the family.
The appeal of Strawberry Bliss Bars lies in their vibrant flavor profile and the simplicity of their preparation. With just a handful of ingredients and a few simple steps, you can whip up a batch that will impress both children and adults alike. The creamy texture combined with the sweet strawberry goodness makes these bars an instant hit, ensuring that they disappear just as quickly as they are made.
The Health Benefits of Key Ingredients
One of the standout features of Strawberry Bliss Bars is the health benefits packed within each delicious bite. The star ingredient, fresh strawberries, is loaded with vitamins, antioxidants, and dietary fiber. They are known to support heart health, improve skin quality, and provide a natural sweetness that reduces the need for excessive added sugars. When selecting strawberries, look for those that are bright red and firm, with a fresh green cap. The more fragrant they are, the riper and sweeter they will be!
In addition to strawberries, Greek yogurt plays a crucial role in this recipe. It is a powerhouse of protein and probiotics, which are essential for gut health. The creamy texture of Greek yogurt not only enhances the bars’ mouthfeel but also adds a richness that balances out the tartness of the strawberries. When choosing Greek yogurt, opt for plain varieties to avoid unnecessary sugars, ensuring your bars remain as healthy as possible.
Coconut cream is another key ingredient that adds a luscious creaminess to Strawberry Bliss Bars. Unlike regular dairy cream, coconut cream is a dairy-free alternative that provides healthy fats, which can help you feel fuller for longer. Its subtle sweetness and unique flavor complement the strawberries perfectly, making it an excellent choice for this recipe.
When it comes to sweeteners, natural options like honey and maple syrup offer the perfect touch of sweetness without the guilt of refined sugars. Honey has antibacterial properties and is known for its soothing effects, while maple syrup contains antioxidants and minerals like manganese and zinc. Depending on your preference, you can choose either sweetener to achieve the desired level of sweetness in your bars.
To create a solid base for your Strawberry Bliss Bars, you’ll need to decide between granola and graham crackers for your crust. Granola provides a chewy texture and a boost of fiber, while graham crackers lend a classic sweetness and crunch. The choice ultimately depends on your flavor preference and dietary needs.
Lastly, don’t overlook the importance of coconut oil and a pinch of sea salt in this recipe. Coconut oil acts as a binding agent, helping to hold the crust together and providing a subtle coconut flavor. Meanwhile, sea salt enhances the overall taste, balancing the sweetness and bringing out the flavors of the other ingredients.
Step-by-Step Guide to Making Strawberry Bliss Bars
Preparing the Crust:
To kick off your Strawberry Bliss Bars, start by preparing the crust—a crucial step for achieving the perfect texture. If you decide to use granola, choose a blend that you enjoy eating on its own, as it will contribute to the overall flavor of the bars. For graham crackers, simply crush them into fine crumbs. In a mixing bowl, combine your chosen crust ingredients with melted coconut oil and a pinch of sea salt. The coconut oil not only adds flavor but also helps to bind the crust ingredients together.
Once combined, press the mixture firmly into the bottom of a lined baking dish. It’s essential to ensure that the crust is packed tightly and evenly to prevent it from crumbling when sliced. The texture should be sturdy enough to hold the creamy strawberry filling, so don’t be shy about using the back of a measuring cup or your fingers to compact it down.
Blending the Strawberry Mixture:
With your crust prepared and set aside, it’s time to focus on the star of the show—the strawberry filling. In a blender or food processor, combine fresh strawberries, Greek yogurt, coconut cream, and your chosen sweetener. Blend until smooth and creamy, ensuring there are no chunks of strawberries left. The goal is to achieve a luscious consistency that flows easily but is thick enough to hold its shape when poured over the crust.
As you blend, take a moment to taste the mixture. This is your chance to adjust the sweetness to your liking. If you prefer a sweeter bar, add a little more honey or maple syrup. If you enjoy a more tart flavor, you can balance it out with a touch more coconut cream or yogurt.
Once you’ve reached the desired taste and texture, pour the strawberry mixture over the prepared crust. Use a spatula to spread it evenly across the surface, ensuring every corner is covered. This step is critical for ensuring that each bar is bursting with flavor.
These initial stages of creating Strawberry Bliss Bars set the foundation for a delicious dessert that combines health and indulgence in one delightful treat. Whether enjoyed at a summer gathering or as a simple after-dinner snack, these bars are sure to delight everyone who takes a bite. Stay tuned as we delve deeper into the remaining steps to complete this refreshing recipe in the next part of our blog post.
{{image_2}}
Layering the Mixture
Creating the perfect Strawberry Bliss Bars is all about the layering process. After preparing your crust and strawberry filling, it’s essential to layer the mixture effectively for a beautifully presented dessert.
Techniques for Evenly Spreading the Filling
To achieve a smooth and even layer of strawberry filling over your crust, start by using a spatula or the back of a spoon. Here’s how to do it:
1. Scoop the Filling: Use a large spoon to scoop out the strawberry filling from the bowl.
2. Dollop and Spread: Place dollops of the filling evenly across the surface of the crust. This technique helps distribute the filling more uniformly.
3. Smooth it Out: Gently press the spatula into the filling and spread it outwards. Start from the center and work your way to the edges, applying light pressure to avoid tearing the crust.
4. Leveling: Once the filling is spread, go over it with a clean spatula or the back of a spoon to level it. This not only enhances presentation but ensures even distribution of flavor in every bite.
Importance of Covering the Crust Completely for Best Results
Covering the crust completely with the filling is crucial for the integrity of your Strawberry Bliss Bars. A well-covered crust prevents any dry edges and ensures that each slice has the perfect balance of crust and filling. Moreover, it allows the flavors to meld during the freezing process, enhancing the overall taste and texture of the bars. Make sure to check for any gaps or exposed crust before moving on to the freezing step.
Freezing Process
Freezing is a pivotal step in perfecting your Strawberry Bliss Bars. It transforms the mixture into a firm yet creamy delight that can be sliced and enjoyed.
Explanation of How Freezing Affects Texture and Taste
When you freeze the strawberry bars, the mixture solidifies while maintaining a creamy texture. The freezing process allows the flavors to meld together, enhancing the sweetness of the strawberries and the richness of the cream. This results in a dessert that is not just refreshing but also deeply flavorful. The creamy filling, once frozen, becomes a delightfully smooth treat that contrasts wonderfully with the crumbly crust.
Recommended Duration for Optimal Results
For the best results, freeze your Strawberry Bliss Bars for at least 4 hours. However, for optimal texture and taste, allowing them to freeze overnight is highly recommended. This extended duration ensures that the bars are thoroughly set and easy to slice. If you plan to make them in advance, they can be stored in the freezer for up to a month without losing quality. Just make sure they are tightly wrapped or placed in an airtight container to prevent freezer burn.
Serving Suggestions
Once your Strawberry Bliss Bars are properly frozen and ready to serve, consider enhancing their presentation and flavor with these delightful serving suggestions.
Ideas for Garnishing the Bars
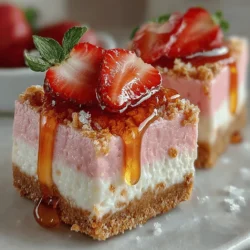
1. Fresh Strawberry Slices and Honey Drizzle: Top each bar with fresh strawberry slices for a pop of color and an extra burst of flavor. A light drizzle of honey adds a touch of sweetness and creates an attractive finish.
2. Serving with Yogurt or a Fruit Compote: Pair your bars with a dollop of Greek yogurt or a homemade fruit compote. This not only complements the flavors but also adds creaminess and richness to each bite.
3. Pairings with Beverages for a Complete Summer Experience: Serve your Strawberry Bliss Bars with a refreshing drink such as iced tea, lemonade, or a fruity smoothie. These pairings elevate the summer dessert experience and make it perfect for gatherings or picnics.
Storage Tips for Strawberry Bliss Bars
Proper storage is key to maintaining the quality and freshness of your Strawberry Bliss Bars. Here are some best practices to ensure they stay delicious for as long as possible.
Best Practices for Freezing and Thawing the Bars
– Freezing: After slicing your bars, arrange them in a single layer on a parchment-lined baking sheet. This prevents them from sticking together. Once frozen solid, transfer the bars to an airtight container or wrap them individually in plastic wrap, then place them in a freezer bag.
– Thawing: To thaw, simply remove the desired number of bars from the freezer and let them sit at room temperature for about 15-20 minutes. Alternatively, you can place them in the refrigerator for a couple of hours for a slower defrost.
Duration of Freshness and How to Maintain Quality
When stored properly, Strawberry Bliss Bars can last up to a month in the freezer. However, for the best texture and flavor, it’s ideal to consume them within the first two weeks. To maintain their quality, ensure the bars are well-wrapped and kept away from strong-smelling foods in the freezer, as they can absorb odors.
Nutritional Information
Enjoying desserts doesn’t have to come with guilt. Here’s a breakdown of the nutritional information for Strawberry Bliss Bars to help you make informed choices.
– Calories: Approximately 150 calories per bar
– Fats: 8 grams (primarily from the crust and any added cream)
– Proteins: 2 grams (from yogurt or cream used in the filling)
– Sugars: 10 grams (from natural sweetness of strawberries and any added sweeteners)
Discussing the Health Aspects of Enjoying Desserts Guilt-Free
Strawberry Bliss Bars not only satisfy your sweet tooth but also provide nutritional benefits from fresh strawberries. Strawberries are rich in vitamin C, antioxidants, and fiber, making this dessert a healthier option compared to traditional sugary treats. By using natural sweeteners and whole ingredients, you can indulge in a dessert that’s both delicious and mindful of your health.
Conclusion
In conclusion, making Strawberry Bliss Bars is a simple yet rewarding process that results in a delightful, refreshing dessert. The harmony of flavors, textures, and vibrant colors make these bars a perfect treat for any occasion, especially during warm summer months.
We encourage you to try this recipe and enjoy the satisfaction of creating a healthy dessert that doesn’t compromise on taste. Whether you’re serving them at a picnic, a family gathering, or simply indulging yourself, these Strawberry Bliss Bars are sure to impress. Their versatility allows them to cater to various palates and dietary preferences, making them a fantastic addition to your dessert repertoire. Go ahead, indulge your sweet cravings guilt-free!