
Lemon desserts have long been a favorite among food enthusiasts, especially during the warmer months. Their bright, tangy flavor brings a refreshing twist to any gathering, making them an ideal choice for picnics, barbecues, and summer parties. Among the many lemon-infused treats, Zesty Lemon Chill Bars stand out as an epitome of simplicity and flavor. These bars are not only easy to prepare, but they also deliver a burst of citrusy goodness that is both invigorating and satisfying.
Zesty Lemon Chill Bars are the perfect warm-weather dessert. Their cool, creamy texture and zesty flavor make them an excellent choice to combat the heat while satisfying your sweet tooth. This no-bake recipe allows you to whip up a delicious treat with minimal effort, making it a go-to option for anyone looking to impress guests or simply indulge in a refreshing dessert at home. The combination of a buttery graham cracker crust and a smooth lemon filling creates a delightful contrast that is sure to please.
Understanding the Ingredients
Before diving into the preparation of these delightful bars, it’s crucial to understand the key ingredients that make them so special. The success of Zesty Lemon Chill Bars lies in the quality and freshness of the ingredients used.
Freshly Squeezed Lemon Juice vs. Bottled Juice
One of the standout components of this recipe is the lemon juice. While bottled lemon juice may seem convenient, it often lacks the vibrant flavor of freshly squeezed juice. Fresh lemons not only provide a more robust taste but also add brightness and depth to the filling. The acidity from fresh lemon juice balances perfectly with the sweetness of the other ingredients, enhancing the overall flavor profile of the bars.
The Role of Sweetened Condensed Milk
Sweetened condensed milk plays a pivotal role in achieving the rich, creamy texture of the lemon filling. This ingredient adds sweetness while also contributing to the structure of the bars. Its thick consistency allows the filling to set beautifully, creating a smooth, luscious layer that complements the tangy lemon flavor.
Highlighting the Graham Cracker Crust
No dessert bar is complete without a solid crust, and for our Zesty Lemon Chill Bars, graham cracker crumbs are the ideal choice. Their subtle sweetness and crumbly texture provide a perfect foundation for the lemon filling. The buttery flavor of the crust pairs harmoniously with the tartness of the lemon, creating a balanced and satisfying experience.
Preparing the Graham Cracker Crust
Now that we’ve reviewed the essential ingredients, let’s move on to the first step in crafting your Zesty Lemon Chill Bars: preparing the graham cracker crust. This process is straightforward and requires just a few simple steps.
Step 1: Preheat the Oven and Prepare the Baking Dish
Start by preheating your oven to 350°F (175°C). While the oven is heating, prepare your baking dish—an 8×8 inch square dish works perfectly for this recipe. Grease the dish lightly with cooking spray or butter to ensure that the bars can be removed easily once they are set.
Step 2: Mixing Graham Cracker Crumbs, Butter, and Sugar
In a mixing bowl, combine 1 and ½ cups of graham cracker crumbs with ½ cup of melted butter and ¼ cup of granulated sugar. The melted butter acts as a binding agent, while the sugar adds a touch of sweetness. Use a fork or a spatula to mix the ingredients until the crumbs are evenly coated and the mixture resembles wet sand.
Step 3: Techniques for Pressing the Crust Evenly
Transfer the graham cracker mixture to the prepared baking dish. Using the back of a measuring cup or your fingers, firmly press the mixture into an even layer across the bottom of the dish. Ensure that the crust is compact and uniform, as this will help it hold together once baked.
Step 4: Importance of Baking the Crust
Place the baking dish in the preheated oven and bake for about 8-10 minutes, or until the crust is lightly golden and fragrant. Pre-baking the crust is a crucial step that enhances the flavor and texture. It helps to firm up the crust and prevents it from becoming soggy once the lemon filling is added. Allow the crust to cool while you prepare the zesty lemon filling.
Crafting the Zesty Lemon Filling
With the crust prepared, it’s time to move on to the star of the show: the zesty lemon filling. This filling is where the magic happens, and understanding the ingredients will help you achieve the perfect consistency and flavor.
Ingredients Breakdown for the Lemon Filling
The filling consists of three primary ingredients: sweetened condensed milk, freshly squeezed lemon juice, and egg yolks. Each component plays a specific role in creating the creamy, tangy filling that defines these bars.
Sweetened Condensed Milk: Its Creamy Contribution
As mentioned earlier, sweetened condensed milk is essential for achieving the rich texture of the filling. It adds sweetness and creaminess, creating a luscious base that complements the tartness of the lemons.
The Balance of Acidity and Sweetness from Lemon Juice
Freshly squeezed lemon juice is the heart of this recipe. Its bright, zesty flavor balances the sweetness of the condensed milk, creating a harmonious blend that is both refreshing and satisfying. The amount of lemon juice can be adjusted based on your personal preference for tartness, but using fresh juice is always recommended for the best flavor.
Role of Egg Yolks in Setting the Filling
Egg yolks are crucial for setting the filling and giving it a smooth, custard-like quality. They provide structure and richness, ensuring that the filling holds together beautifully once chilled.
Mixing Tips to Achieve the Perfect Consistency
To create the filling, simply whisk together the sweetened condensed milk, freshly squeezed lemon juice, and egg yolks in a mixing bowl until smooth. It’s important to mix thoroughly to ensure that the egg yolks are fully incorporated, preventing any clumps in the final filling. Once the mixture is well combined, pour it over the cooled graham cracker crust, smoothing it out with a spatula.
With the crust and filling prepared, you are well on your way to creating a batch of delightful Zesty Lemon Chill Bars that are sure to impress everyone at your next gathering. Stay tuned for the final steps of this refreshing dessert, where we’ll cover how to chill, cut, and serve these delicious bars.
{{image_2}}
Ensuring a Lump-Free Mixture for Smooth Bars
Before we dive into the baking process, it’s essential to ensure that your lemon filling is smooth and creamy. A lump-free mixture not only enhances the texture of your Zesty Lemon Chill Bars but also makes for a more enjoyable taste experience.
1. Sifting Dry Ingredients: Start by sifting your dry ingredients, such as flour and sugar, to break up any clumps. This is especially important if you’re using powdered sugar for your filling, as it can clump together and create an uneven texture.
2. Room Temperature Ingredients: Make sure your eggs and cream cheese (if using) are at room temperature. Cold ingredients can lead to a lumpy mixture as they do not incorporate well with the other components.
3. Mixing Technique: When mixing the filling, begin at a low speed until the ingredients are combined, then increase to medium speed. This method helps to prevent air pockets and encourages a smooth blend. Scrape down the sides of the bowl periodically to ensure all ingredients are incorporated evenly.
4. Final Blend: Once you’ve combined the eggs, lemon juice, lemon zest, and any other ingredients, blend for an additional 30 seconds at high speed to achieve a silky-smooth consistency.
Baking the Bars
Instructions for Pouring and Spreading the Filling
With your mixture ready, it’s time to pour and spread the lemon filling over the crust.
1. Pouring the Filling: Gently pour the lemon filling onto the cooled crust. Start from the center and let it flow outwards. This method helps minimize disruption of the crust and prevents it from breaking or cracking.
2. Spreading the Filling: Use a spatula to spread the filling evenly across the surface. Be gentle to avoid disturbing the crust. The filling should be level and smooth, which will give your bars an appealing appearance once cut.
Techniques for Even Distribution Over the Crust
To achieve an even layer of filling, consider these techniques:
– Tapping the Pan: Once you’ve spread the filling, gently tap the pan on the counter. This will help release any air bubbles and encourage the filling to settle evenly.
– Spatula Technique: After tapping, you can run your spatula back and forth across the surface of the filling, smoothing it out in a back-and-forth motion until it’s perfectly level.
Baking Times and Signs of Doneness
Baking your Zesty Lemon Chill Bars requires attention to detail. Here’s how to tell when they’re done:
1. Baking Time: Bake the bars in a preheated oven at 350°F (175°C) for approximately 25-30 minutes.
2. Signs of Doneness: The edges of the filling should be set, while the center may still have a slight jiggle. This indicates that the filling is cooked but not overdone.
Understanding the Jiggle Test for Perfect Lemon Filling
The jiggle test is key to achieving the perfect texture. Here’s what to look for:
– Gentle Jiggle: When you gently shake the pan, the filling should wobble slightly in the center but be firm around the edges. If it appears liquidy or overly jiggly, it may need a few more minutes in the oven.
– Cooling Down: Remember, the filling will continue to set as it cools, so don’t be tempted to overbake!
Cooling and Chilling Process
Importance of Cooling the Bars Before Refrigeration
Once your bars are out of the oven, it’s crucial to let them cool before placing them in the refrigerator. Here’s why:
– Texture Integrity: Cooling the bars at room temperature allows the filling to firm up, ensuring that they hold their shape when cut. If you refrigerate them too soon, you risk having a soggy crust.
How This Affects the Final Texture
Allowing the bars to cool properly will ensure:
– Improved Flavor: Cooling enhances the flavor profile, allowing the zesty lemon flavor to develop fully.
– Better Sliceability: A cooled filling is easier to slice into clean, neat squares without falling apart.
Recommended Chilling Time for Best Results
For the best flavor and texture, chill the bars in the refrigerator for at least 4 hours, but overnight is ideal. This extended chilling time allows the flavors to meld beautifully.
Why Patience Pays Off for Flavor Enhancement
The longer the bars chill, the more refreshing and zesty they become. Patience pays off, as the cool lemon filling contrasts delightfully with the buttery crust, creating a harmonious balance of flavors that will impress everyone.
Serving Suggestions
Presentation Ideas for Zesty Lemon Chill Bars
When it comes to serving your Zesty Lemon Chill Bars, presentation is key. Here are some ideas to elevate your dessert:
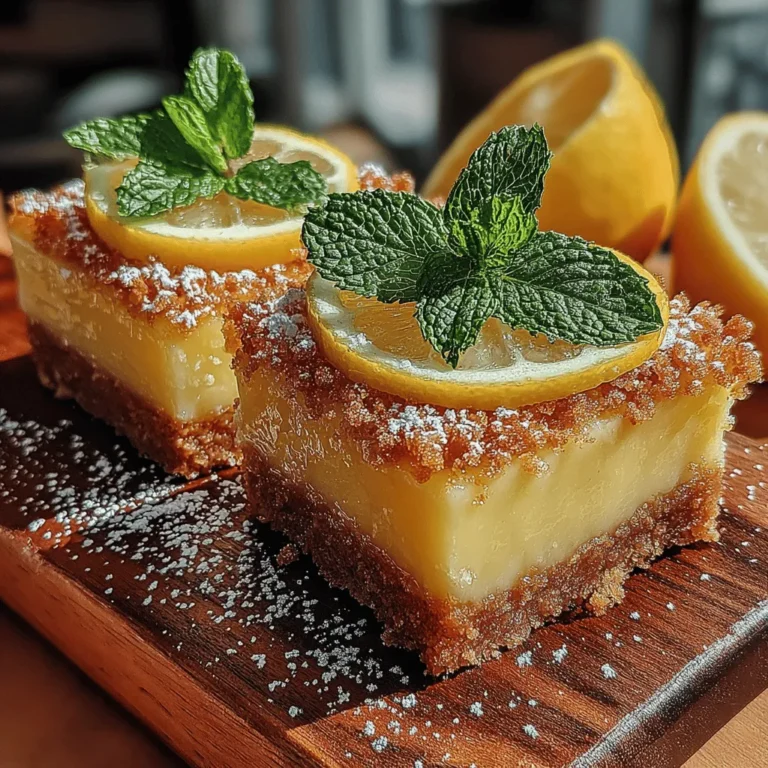
– Dusting with Powdered Sugar: Just before serving, lightly dust the top of the bars with powdered sugar for a beautiful and elegant finish. This adds a touch of sweetness without overwhelming the zesty flavor.
– Garnishing with Fresh Mint Leaves: Add a sprig of fresh mint on each bar or alongside the serving platter. This not only adds a pop of color but also a refreshing aroma that complements the lemon flavor.
Pairing Ideas
The right beverage can enhance your dessert experience. Here are some complementary beverage suggestions:
– Iced Tea: Serve your bars with a chilled glass of iced tea, whether sweetened or unsweetened, to balance the tartness of the lemon.
– Lemonade: For a refreshing twist, pair your bars with a glass of lemonade, reinforcing the citrus theme of the dessert.
– Sparkling Water: A refreshing glass of sparkling water with a slice of lemon is a light option that cleanses the palate.
Nutritional Information
Breakdown of Nutritional Content Per Serving
Understanding the nutritional content of your Zesty Lemon Chill Bars can help you make better dietary choices. Here’s an approximate breakdown per serving (assuming you cut the bars into 12 squares):
– Calories: 180
– Total Fat: 7g
– Saturated Fat: 4g
– Cholesterol: 40mg
– Sodium: 50mg
– Total Carbohydrates: 27g
– Dietary Fiber: 1g
– Sugars: 14g
– Protein: 2g
Discussing Potential Dietary Modifications
If you’re looking for dietary adaptations, consider the following options:
– Gluten-Free: Substitute all-purpose flour with a gluten-free flour blend. Ensure all other ingredients are gluten-free too.
– Vegan Adaptation: Replace eggs with a flaxseed meal or a commercial egg replacer and use a non-dairy butter alternative for the crust. Additionally, use a plant-based cream cheese for the filling.
Conclusion
Zesty Lemon Chill Bars are a delightful treat, perfect for warm weather gatherings or special occasions. Their bright, tangy flavor combined with a buttery crust makes them universally appealing. Whether you serve them at a summer barbecue, a picnic, or simply enjoy them on a sunny afternoon, these bars promise to refresh and delight.
Creating this homemade dessert is not only easy, but it also provides a sense of satisfaction knowing you’ve crafted something delicious from scratch. So, gather your ingredients, follow the steps outlined, and indulge in the refreshing taste of homemade Zesty Lemon Chill Bars. Enjoy every bite!
